
Thank you to all who attended the IT training session, we were so pleased that you came to learn how to use the volunteers’ portal or just to spruce up your knowledge of how to “surf” the Internet! Your continued trust in us makes organising such events so worthwhile, so keep a lookout on the Calendar for future exciting events!
Also, we are planning to upload the resources here so you'll never again forget all you learned at the training session (hopefully!).
Please let us know if the training session was helpful and if you'd like to see more training events like this for volunteers. If you have any suggestions or want to share an idea with us, drop us a line on the comment box below. We'll be happy to hear from you, we don't bite!
YOUR IT QUESTIONS ANSWERED
Before the IT session we asked attendees to send in any questions they wanted answered and so please see below for detailed answers to these questions:
1 How do I locate files, add to them and move items into them?
When you open the main folder called ‘documents’ it gives you the option of searching within it, all you need to do is click in the white bar on the top right corner of your screen. Adding and moving items into folders is done by dragging items in and out of them, either from your desktop, or you can open two my "my documents" screens, sit them side by side and then drag and drop between the two.
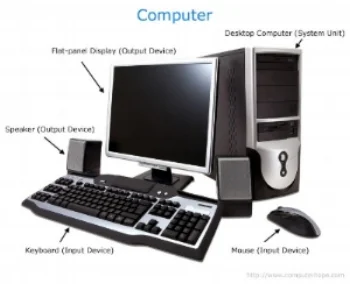
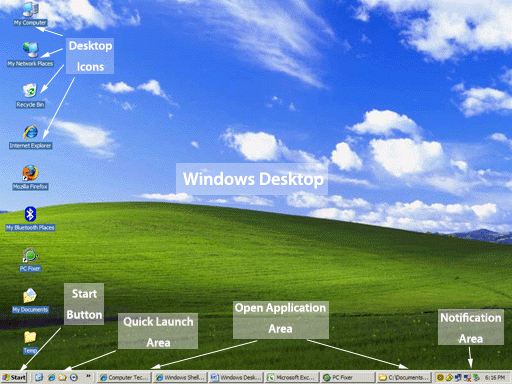
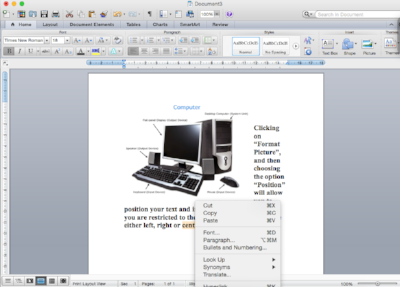
2 Which bits of the screen are called what:
3 What does "read this in your browser" mean?
Your browser is the page you open to use the Internet. So when there is an option to "read this in your browser" it means read this as a webpage rather than in your emails. It may give you a better view as it may be larger and therefore easier to read. However, this is just a personal preference, so you never need to read it in your browser, it is just if you would like to.
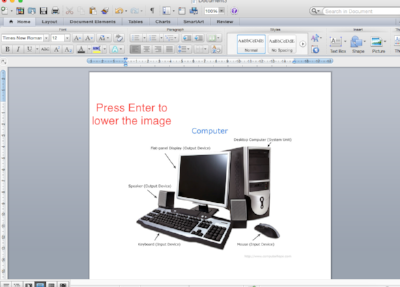
4 How do you make things print in the middle of page?
Press enter to lower the image
Or
Right click on the image, go to "wrap text" and select the drop down option "tight". You can then move the image wherever you want.
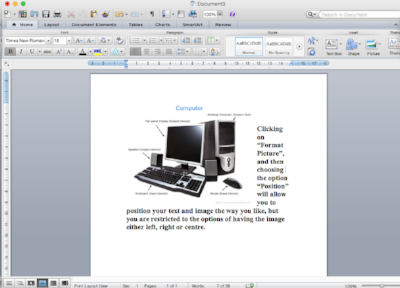
5 How do you put a photo on a specific part of the page?
You can use the above option or use the information in the screen shot below:
6 How do you put photos into chronological order?
The best idea is to put the date of the picture on the file name. That way, your photos will automatically show up in chronological order.
7 How do you get rid of stuff on side of page which blocks your view?
You can press the red button on the top left corner of each “window” to get rid of it. Or alternatively use the Maximise square by the X button to make whatever you're reading full size.
8 How do you use cut, copy and paste and also drag and drop?
Cut, copy and paste by selecting the text you would like to cut, copy or paste and then right clicking on that option (it comes up as one of the top three options). Then from the drop down options select which you'd like with your mouse.
Drag and drop by clicking on your file or image, and make sure to continue pressing the mouse button and moving it to where you want to drop your file – release the mouse button to drop.
9 Can you give some tips about file management and photos?
As a general rule, it is always best to ensure you save a file or a photo under the most precise names you can give it. For instance, if you want to save a photo of the Putney Christmas market, it is best to include the date as well since you may take another photo at the Putney Christmas market the next year. You don’t want to replace the older photo with the new one.
You can create files in My Documents, and then whenever you log onto your laptop / PC they will always be saved in there. Within a folder you can make as many new folders as you would like to make your files easy to manage.